Guide to Ordering a Printing Item
We pride ourselves on quality, reliability and customer satisfaction. We provide a free artwork mock-up service for all our customers and our in-house design team work hard to turn around visuals within 24hrs* of receiving your enquiry.
We make the entire process of ordering and producing a printing item simple and smooth, overall there are five steps.
We Make Custom Printing Easy
We Can Print A Range of Different Areas

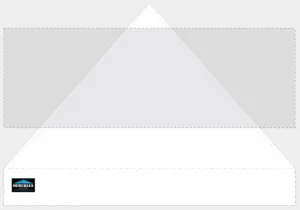
Sloping Roof Panel
✔ This is the prominent position and great from a distance to draw people closer
✔ Suitable for large logos, graphics and creative design
✔ Full-colour digital printing
Valance Panel
✔ This area is often the first place people look than the sloping roof area
✔ Suitable for conveying marketing messages, logos and websites, etc
✔ Full-colour digital printing
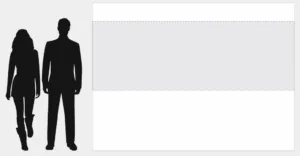
Sidewall
✔ This can be inside, outside, or even double-sided printing
✔ Suitable for large logos, graphics and other branding message, etc
✔ Full-colour digital printing
Artwork Requirement
For your artwork to be produced accurately and efficiently, please ensure that you follow the requirements below.
Logo Format
Please supply your logo and artwork in high-resolution vector format, we accept the following files, .ai (Adobe Illustrator), .eps (Encapsulated PostScript) or PDF (as long as the vector graphic is saved in PDF).
Colour Format
Please provide all artwork and logos in CMYK colour format (Cyan, Magenta, Yellow and Key–Black). This is the preferred format for colour printing, and should not be confused with RGB (Red, Green, Blue), which is how screens display digital colour. When colour matching please refer to printed CMYK or Pantone colour books, as RGB screen colours cannot always be reproduced when printing.
Artwork not supplied to our requirements will likely render an unsatisfactory result or delay your order. If you are unsure about the artwork you have, please check with us beforehand to ensure there are no complications with your order.
If artwork cannot be used to produce what has been ordered, we will advise you of this and request how you would like to proceed.
Pop Up Gazebo Custom Printing : Tips on Where to Position Your Artwork
People often ask for logos and information printed in various positions on our gazebos.
Whilst the designs may look great on paper, please bear in mind what you will be using the gazebo for, and where the most prominent print positions are visually for people to see your brand.
Canopies are great from a distance to draw people closer and the valance area is often the first place people look than the canopy triangle area.
The canopy is fitted to fit the frames of all our gazebos to ensure a tight fit for water runoff. With this natural curvature, the bottom 1/3 is not the most visible area, so we always try to ensure the focus of your design is in the top 2/3 of the canopy triangle.

With walls, especially the inside back wall, if you have a table or if people have left bags in front of this panel parts of your logo get covered.
We always advise to raise your brand to an eye level so this increases on the visibility and is the most prominent area for when people walk into the gazebo.
Whilst a fully customised gazebo with double-sided walls looks great, if you are always exhibiting with the back or sides of the gazebo to a wall or another gazebo this may not need to be printed, we have many printing options and can customise your gazebo t whatever your needs may be.